Pruning Photinia is essential for maintaining its vibrant foliage and ensuring healthy growth. Whether you’re cultivating it as a hedge or a standalone shrub, regular pruning improves air circulation, reduces disease risk, and encourages lush red foliage. In this guide, we’ll cover the best time to prune, essential tools, step-by-step techniques, and expert tips to keep your Photinia thriving.
Why Pruning Photinia is Important
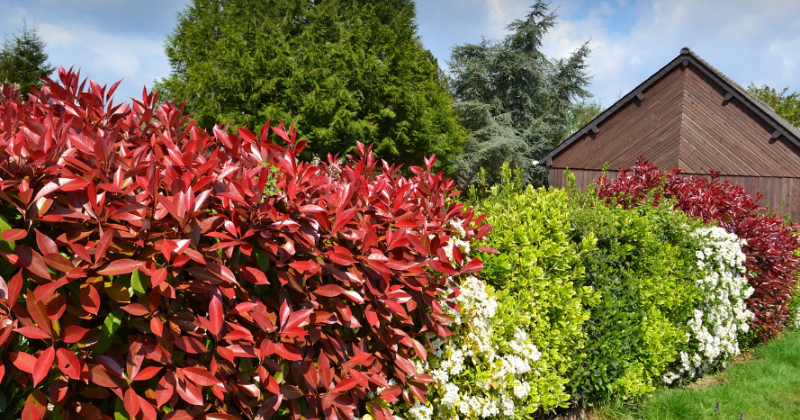
Photinia, particularly the popular Photinia x fraseri ‘Red Robin’, grows vigorously and requires routine pruning to maintain its shape and structure. Key benefits of pruning include:
- Promoting new growth, resulting in vibrant red leaves.
- Preventing overcrowding, reducing the risk of fungal infections like leaf spot.
- Encouraging a dense hedge or well-formed tree.
- Removing dead, diseased, or damaged branches.
Best Time to Prune Photinia
Timing is crucial for effective pruning. Follow these seasonal guidelines:
- Early Spring (Before New Growth Begins): Ideal for major shaping and thinning.
- Late Spring to Early Summer: Light trimming after flowering to maintain shape.
- Avoid Late Autumn or Winter Pruning: Fresh cuts are vulnerable to frost damage.
- Bird Nesting Season Consideration (March–September): Avoid drastic pruning to protect nesting birds.
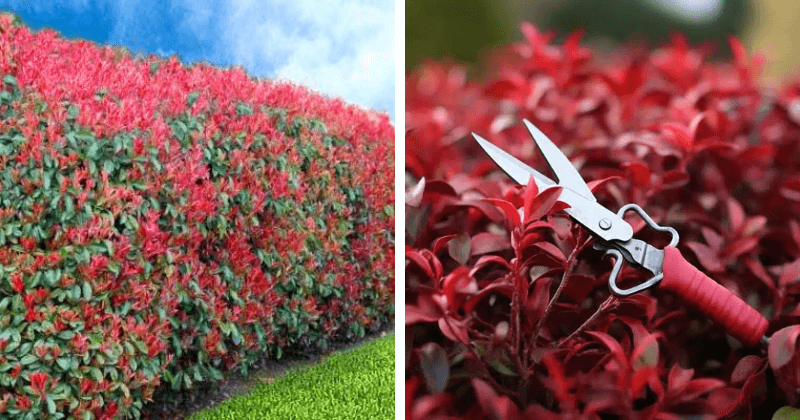
Tools Needed for Pruning
Using the right tools ensures clean cuts and reduces plant stress. Recommended tools include:
- Sharp Pruning Shears – For small branches and precise cuts.
- Loppers – Useful for thicker branches.
- Hand Saw – Ideal for mature, woody growth.
- Disinfectant – Clean tools before and after use to prevent disease spread.
How to Prune Photinia Step-by-Step
Follow these steps to effectively prune your Photinia:
1. Remove Dead or Diseased Wood
- Inspect the plant for dead, diseased, or damaged branches.
- Cut back to healthy wood, making clean cuts at an angle.
- Dispose of infected material properly to prevent spreading diseases.
2. Thin Out Overcrowded Growth
- Selectively remove inward-growing or crossing branches.
- This improves airflow, reducing the risk of fungal infections.
- Aim for an open structure to allow sunlight penetration.
3. Shape the Plant
- For Hedges: Trim the top slightly narrower than the base to allow even light distribution.
- For Standalone Trees: Maintain a balanced crown by shortening long shoots and removing suckers from the trunk.
4. Encourage New Growth
- Light trimming throughout the growing season promotes fresh red foliage.
- Avoid over-pruning, as excessive cuts can lead to stress and weak regrowth.
Expert Tips for Successful Pruning
- Prune on Dry, Sunny Days: This helps cuts heal faster and reduces fungal infection risks.
- Avoid Using Electric Trimmers: They can cause leaf damage; hand pruning ensures cleaner cuts.
- Feed After Pruning: Apply a balanced fertilizer to support healthy regrowth.
- Monitor for Diseases: Watch for leaf spot and treat with appropriate fungicides if needed.
Common Mistakes to Avoid
- Pruning Too Late in the Year: This can leave fresh cuts exposed to frost damage.
- Over-Pruning: Removing too much foliage at once weakens the plant.
- Ignoring Diseased Branches: Always remove infected parts promptly to prevent spread.
FAQs
When should I prune my Photinia hedge?
The best time to prune a Photinia hedge is in early spring before new growth starts. Light trimming can be done in late spring or early summer after flowering.
How much should I prune off my Photinia?
Avoid removing more than one-third of the plant at a time. Light, frequent pruning is better than severe cuts.
What if my Photinia has overgrown?
If your Photinia is overgrown, perform renovation pruning by cutting back up to half its height in early spring. Be patient, as recovery may take a season or two.
Conclusion
Pruning Photinia correctly enhances its health, structure, and visual appeal.
By following these best practices, you’ll maintain a thriving, disease-resistant plant that adds beauty