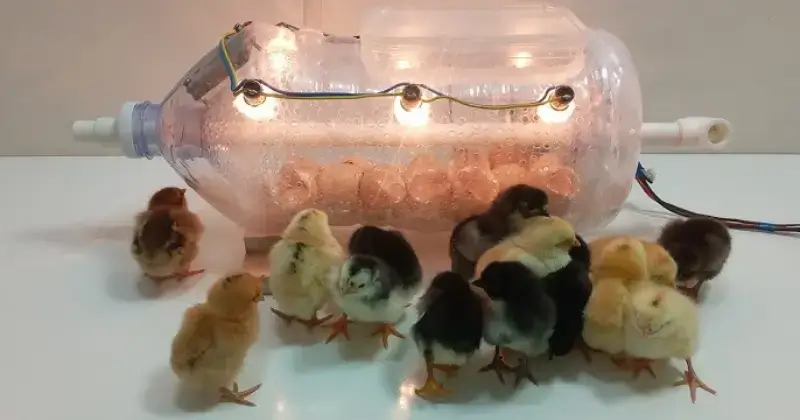
If you are looking for an affordable and effective way to hatch eggs at home, building a homemade egg incubator using a water bottle is a great solution. This method is cost-effective, easy to set up, and ensures a controlled environment for successful egg incubation. In this guide, we will walk you through the step-by-step process of creating an egg incubator using common household materials.
Why Build a Homemade Egg Incubator?
Egg incubators provide a stable and warm environment for eggs to hatch successfully. Commercial incubators can be expensive, but a DIY version allows you to achieve similar results at a fraction of the cost. Some benefits of a homemade egg incubator include:
- Cost savings compared to store-bought models.
- Full control over temperature and humidity levels.
- The ability to experiment and improve hatch rates.
Materials Needed
To build your own egg incubator, you will need the following materials:
- A large plastic water bottle (preferably 5-liter capacity)
- A 25- to 40-watt incandescent light bulb
- A small lamp holder or socket
- A thermometer and hygrometer
- A sponge (for humidity control)
- Aluminum foil
- Scissors or a utility knife
- Duct tape or strong adhesive
- A small plastic container for water
Step-by-Step Guide to Building the Egg Incubator
Step 1: Prepare the Water Bottle
- Cut the plastic water bottle horizontally, about two-thirds from the bottom. This creates a base and a removable lid for easy access.
- Line the inner walls with aluminum foil to help retain heat and distribute it evenly inside the incubator.
Step 2: Install the Heat Source
- Cut a small hole in the side of the bottle to insert the lamp holder.
- Secure the light bulb in the socket and place it inside the incubator.
- Ensure the bulb is positioned to provide consistent heat without directly touching the eggs.
Step 3: Monitor Temperature and Humidity
- Attach a thermometer and hygrometer inside the incubator to monitor conditions.
- Fill a small plastic container with water and place a sponge inside to maintain humidity levels.
- Adjust the amount of water to regulate humidity, aiming for 50-60% during incubation and increasing to 65-75% for hatching.
Step 4: Placing the Eggs
- Arrange the eggs inside the incubator, ensuring they have enough space for air circulation.
- Turn the eggs at least three times a day to prevent the embryo from sticking to the shell.
- Maintain an internal temperature of around 99.5°F (37.5°C) for optimal development.
Step 5: Regular Maintenance and Monitoring
- Check the thermometer and hygrometer daily to ensure stable conditions.
- Refill the water container as needed to maintain humidity.
- Turn the eggs regularly for even heat distribution.
Common Mistakes to Avoid
- Inconsistent Temperature: Avoid placing the incubator in a drafty area or direct sunlight.
- Poor Humidity Control: Regularly check the water levels to prevent excessive dryness or excess moisture.
- Not Turning the Eggs: Failing to rotate the eggs can lead to poor hatch rates.
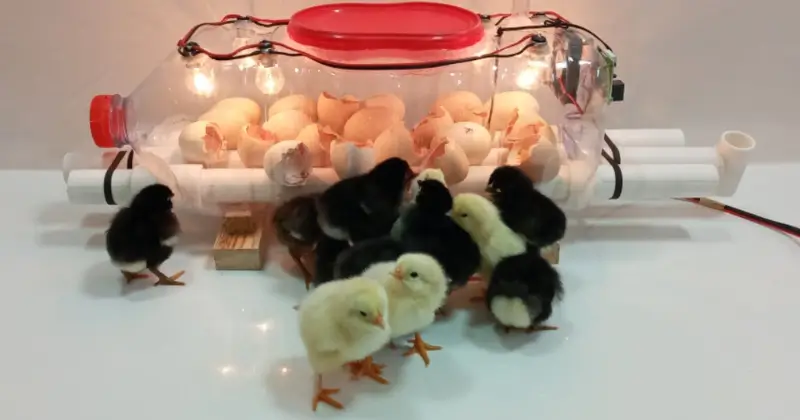
Expected Hatch Time
Most eggs take around 21 days to hatch. During the final three days, stop turning the eggs and increase humidity to support successful hatching.
For more tips and tricks, discover our articles
FAQ
How long does it take for eggs to hatch in a homemade incubator?
Eggs typically hatch within 21 days, though this may vary slightly depending on conditions.
What should I do if the temperature fluctuates?
Use a stable heat source and monitor frequently. If necessary, adjust the position of the bulb or add insulation to maintain consistent warmth.
Can I use an LED bulb instead of an incandescent one?
No, LED bulbs do not generate enough heat. A 25- to 40-watt incandescent bulb is recommended.
Conclusion
Building a homemade egg incubator using a water bottle is a practical and cost-effective way to hatch eggs at home.
By carefully maintaining temperature, humidity, and egg rotation, you can increase the chances of a successful hatch. Try this DIY project and enjoy the rewarding experience of hatching your own eggs.